
The blockchain technology provides interoperability between various blockchains, allowing for data and asset exchange, such as NFTs or cryptocurrencies, across different platforms. Avalanche is a universal and interoperable platform with a PoS consensus, developed by Ava Labs. It addresses scalability, security, and decentralization challenges. It has a native token called AVAX and supports smart contracts, competing with Ethereum. Interacting between Avalanche and Ethereum, as well as DeFi, is facilitated through the MetaMask wallet. Users need to add the Avalanche network to MetaMask before interacting with Ethereum and DApps.
Contents:
- MetaMask Installation Guide
- Step-by-step Guide: Configuring Avalanche Network in MetaMask
- How to Transfer AVAX Tokens to the MetaMask Wallet?
- What other wallets can be used with Avalanche?
MetaMask Installation Guide
MetaMask is a cryptocurrency wallet that allows users to interact with decentralized applications (DApps) and store Ether (ETH) and ERC-20 standard tokens. Connecting MetaMask to the Avalanche network provides AVAX users access to all Ethereum DApps' capabilities without leaving the Avalanche network. It also makes the network more appealing to developers, as it utilizes the Solidity smart contract programming language widely used in Ethereum.
The Avalanche network consists of three blockchains: the Exchange Chain (X-Chain), Contract Chain (C-Chain), and Platform Chain (P-Chain).
The Exchange Chain (X-Chain) is used for sending and receiving AVAX and cannot be used on Web3 platforms or added to Web3 wallets like MetaMask. The Platform Chain (P-Chain) is a metadata blockchain that coordinates validators, tracks active subnets—sovereign networks that define their participation rules and token economics—and enables the creation of new subnets.
To transfer AVAX from the Avalanche wallet, users need to have tokens on the C-Chain or use an exchange wallet integrated with the C-Chain, such as Binance. If the tokens are not on the C-Chain, they can easily be transferred within the network from another wallet by paying a small transaction fee.
MetaMask can be added as an extension for browsers like Chrome, Firefox, Opera, Brave, and mobile devices on iOS or Android from the official MetaMask website. In this article, we'll cover the Chrome extension version.
Users should always verify the authenticity of the MetaMask website to avoid scams and data breaches. It's recommended to download the extension only from the official website.
On the official MetaMask website, click on the "Download for Chrome" link and install the extension by clicking "Add to Chrome". Follow these steps afterward:
- Install the MetaMask extension for Chrome and click "Get Started" on the MetaMask welcome page.
- You have two options: import an existing cryptocurrency wallet by entering the wallet's seed phrase and selecting "Import Wallet," or create a new wallet by clicking "Create Wallet." If you're creating a new wallet, you'll need to create a strong password to access it from your device.
- The next page will display crucial information about your seed phrase. This phrase is a security key and a backup of your cryptocurrency wallet. It will allow you to access your wallet and tokens even if you lose or forget your password.
- Click the lock icon to view the seed phrase. Write down the words in the correct order, store them in a secure offline location, and never share them with anyone. The security of your assets could be compromised if someone gains access to your seed phrase and compromises your device.
- The system will ask you to repeat the seed phrase on the next page; make sure to choose the words in the correct order.
- Afterward, click "Confirm" and then "Done" to access your new wallet.
Note that the process described above will automatically link MetaMask to the Ethereum network. However, to add the Avalanche network to MetaMask, follow these additional steps.
Step-by-step guide: Setting up Avalanche Network in MetaMask
Connecting to the Avalanche Network on MetaMask is a relatively straightforward process. After logging into your MetaMask wallet, follow these steps:
- Select the Ethereum mainnet network from the network menu in MetaMask.
- Choose the "Custom RPC" option, as shown below:
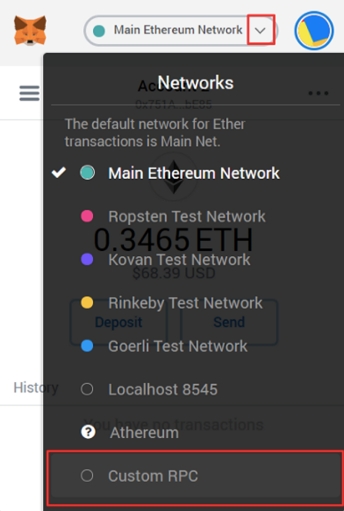
You will be redirected to the "Add Network" page, where you need to enter the following information:
Network Name Avalanche Network New RPC URL https://api.avax.network/ext/bc/C/rpc ChainID 43114 Symbol AVAX Explorer https://snowtrace.io/
You can review the requirements for adding a network to MetaMask for use with Avalanche here.
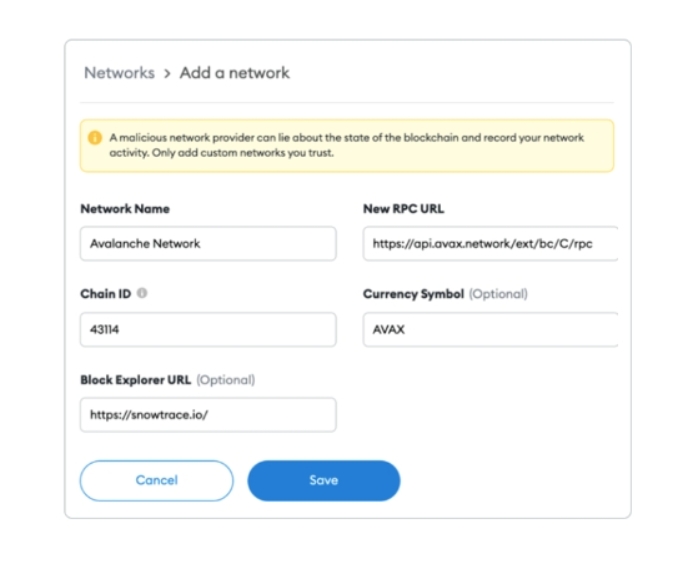
Click "Save" to complete the process. You are now ready to use MetaMask on the Avalanche Network and explore all its DeFi and Web3 applications.
How to Transfer AVAX Tokens to the MetaMask Wallet?
After connecting the Avalanche network with MetaMask, you can transfer your AVAX coins from your Avalanche wallet to your MetaMask wallet. Please note that only the C-Chain blockchain is compatible with MetaMask.
Here are the steps for the transfer:
- Log in to your Avalanche wallet and, if you have tokens on the P-Chain or X-Chain blockchains, transfer them to the C-Chain blockchain.
- Navigate to the "Cross Chain" tab in the left menu and select "C-Chain" as the target blockchain.
- Enter the amount you want to transfer and click "Confirm." Note that a small transaction fee will be added to the final amount.
- Now, to send AVAX coins to MetaMask, go to the "Send" tab in the left menu.
- Select "C Contract" as the transaction source and enter the amount you want to send to MetaMask.
- Next, go to your MetaMask wallet, copy the address, and paste it into the "To Address" field on the Avalanche wallet.
- Before confirming the transaction, ensure you have enough gas to cover the transaction fee.
- Click "Confirm" and complete the transaction.
- Once the transaction is confirmed, the AVAX coins will appear in your MetaMask wallet.
What other wallets can be used with Avalanche?
MetaMask is a versatile wallet for DeFi designed for interacting with smart contracts and decentralized applications (DApps). However, AVAX can also be transferred, stored, staked, and traded using other hot and cold wallets. Coinbase Wallet, with over 90 million verified users worldwide, provides a secure and easy way to exchange, earn, and store AVAX. Two-factor authentication enhances security, making it suitable for both beginners and experienced users.
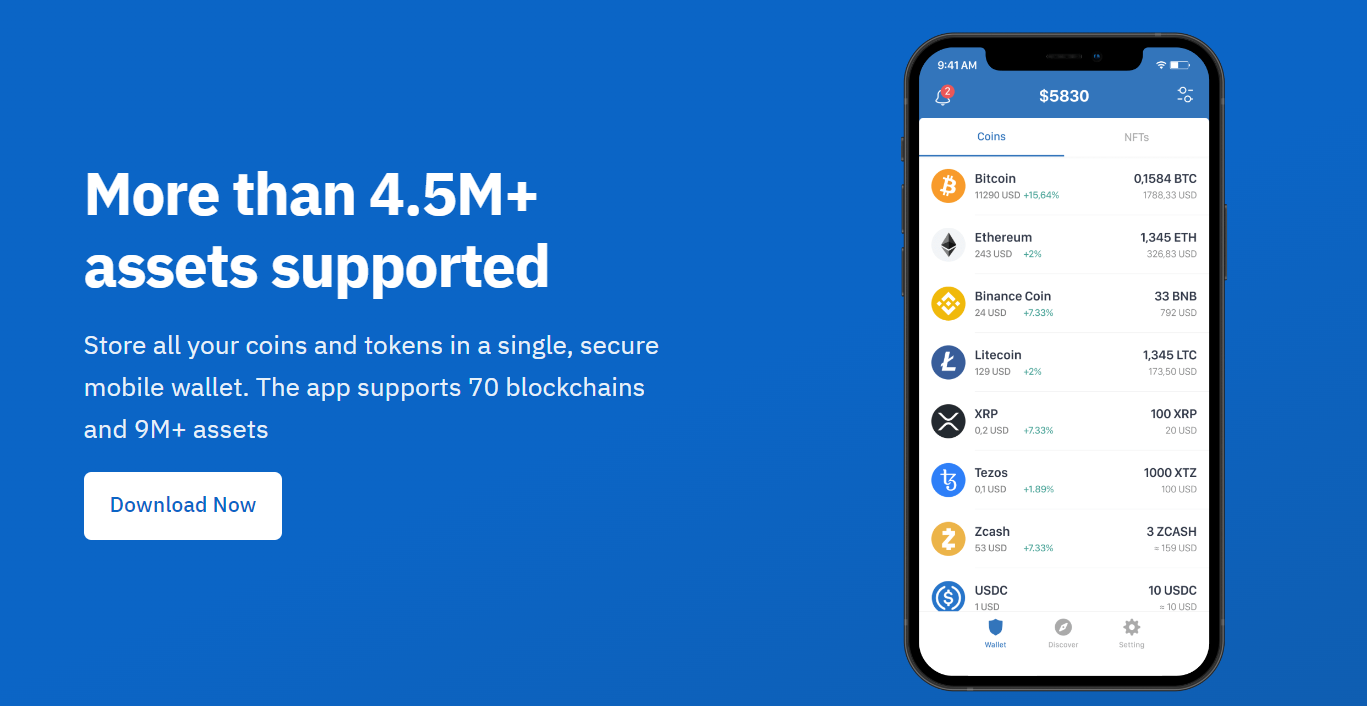
Trust Wallet is another hot wallet that supports all DeFi applications, including NFT storage, Web3 functionality, staking, trading, and purchases. It also supports Avalanche C-Chain and numerous other blockchains, facilitating interaction between DApps and AVAX. This hot wallet is popular among Web3 enthusiasts due to its user-friendly interface and flexibility.
Cold wallets like Ledger Nano S or X also support Avalanche, allowing users to access and store their AVAX tokens across Avalanche chain addresses. Cold wallets are recommended compared to hot wallets because the private keys to access the cryptocurrency are stored offline on a hardware device, making them reliable in safeguarding against hackers and malicious actions.